• About Us
  • DIY Projects
  • Home Decor And Design
  • Contact Us
  • Newsletter
  • Privacy Policy
  • Write for Me
How To Build It
Menu
  • About Us
  • DIY Projects
  • Home Decor And Design
  • Contact Us
  • Newsletter
  • Privacy Policy
  • Write for Me
 › DIY Projects › Home Decor And Design › How to Install Beadboard In Your Home

How to Install Beadboard In Your Home

Jenn @ HBI May 11, 2018     No Comment    

Beadboard | Learn How to Install Beadboard in Your Home | Install Beadboard | Tips and Tricks to Install Beadboard | How to Install Beadboard


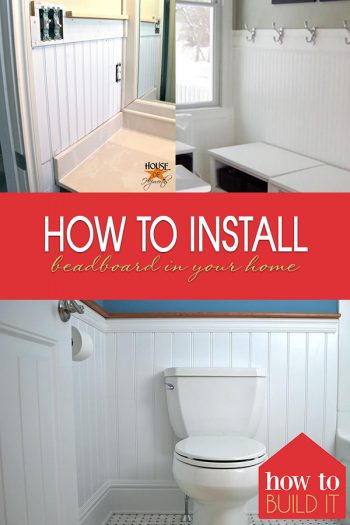
It’s easy to install beadboard! For years I’ve loved what the simple addition of beadboard does for the entirety of your home. Seriously, in just a quick DIY your home is immediately classier! If you want to install beadboard in your own home, use my easy DIY method. Here’s how to install beadboard in your home!

Here’s what you’ll need:

-brad nailer

-laser level

-miter saw

-MDF

-molding

-construction adhesive

Beadboard | Learn How to Install Beadboard in Your Home | Install Beadboard | Tips and Tricks to Install Beadboard | How to Install Beadboard


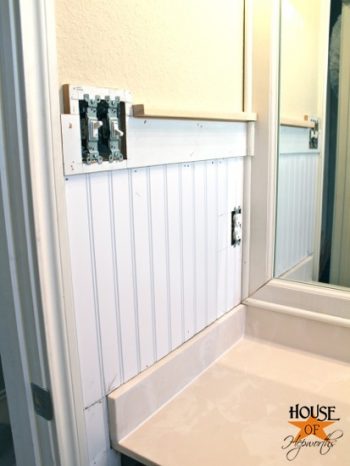
Step One: Use a laser level to determine how long and tall your wainscoting (beadboard) will need to be. A laser level will help you make sure that your horizontal line is perfectly even. Use a regular measuring tape for anything measurement related, and mark off the measurement with chalked twine. Remove any outlet covers if necessary!

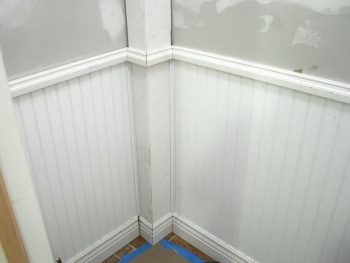
Step Two: Now you will want to cut your MDF to the appropriate sizing. I usually make my strips 5 inches (ish) wide. Use the strips to line the base of the room. Wherever your pieces of MDF meet, be sure to cover with scarf joints so the seams are literally seamless. Corner pieces should join at 45 degrees.

Step Three: Attach pieces to the wall with brad nails.

Beadboard | Learn How to Install Beadboard in Your Home | Install Beadboard | Tips and Tricks to Install Beadboard | How to Install Beadboard


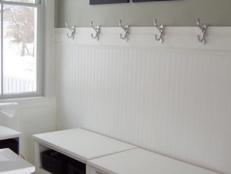
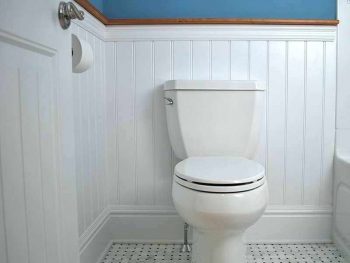
Step Four: Now, you’ll want to halve your 5×8 strips of wainscoting. Cover thoroughly with construction adhesive. Attach to the wall so the wainscoting lines run vertically. Beadboard should be attached right on the strips of MDF around the base of your room.

Step Five: Nail the wainscoting down with 2 inch brad nails. This will help ensure that the bond between the wainscoting and the wall holds up for decades!

Step Six: Trim any beadboarding to fit awkward gaps and corners on your work space.

Beadboard | Learn How to Install Beadboard in Your Home | Install Beadboard | Tips and Tricks to Install Beadboard | How to Install Beadboard


Step Seven: Next, you will want to tack the wainscoting to the MDF baseboard. Use brad seams, and ensure that scarf joints are used if needed!

Step Eight: Add a chair rail by coating the railing in construction adhesive and attach with 2 inch brad nails.

Step Nine: Enjoy your brand new beadboarding!

Beadboard | Learn How to Install Beadboard in Your Home | Install Beadboard | Tips and Tricks to Install Beadboard | How to Install Beadboard

DIY Projects Home Decor And Design
beadboardDIYFast Home Improvement IdeasHome DecorHome Decor Ideashome improvementHome Improvement IdeasInstall Beadboard

 Previous Post

How to Paint Anything (And Get the Perfect Line)

― May 1, 2018

Next Post 

How to Build Your Own DIY Bookcase

― May 11, 2018

Author: Jenn @ HBI

Related Articles

Jenn @ HBI ― December 4, 2019 | No Comment

5 Frugal Kitchen Updates You Can’t Afford To Pass Up

I’ve always said that the kitchen says a lot about the rest of your house. And when we were looking

Jenn @ HBI ― November 27, 2019 | No Comment

DIY Snowflake Holiday Decor Ideas That Are Awesome

Jenn @ HBI ― November 20, 2019 | No Comment

Awesome DIY Giant Outdoor Christmas Lights

Jenn @ HBI ― November 13, 2019 | No Comment

Cheap And Easy Outdoor Giant Christmas Ornaments (That Are Freakin’ Cute)

Jenn @ HBI ― October 30, 2019 | No Comment

DIY Mouse Repellent Ideas That Really Work

Jenn @ HBI ― October 23, 2019 | No Comment

DIY Christmas Gifts Made With Barnwood (That You’ll Want To Keep For Yourself)

Jenn @ HBI ― October 16, 2019 | No Comment

Bedroom Door Painting Trend Every Ugly Door Needs

Jenn @ HBI ― October 11, 2019 | No Comment

Creative DIY Ideas For Kitchen Backsplashes That Don’t Use Tile

Leave a Reply Cancel reply

Search Here

Follow Me!

Pinterest Facebook Twitter

RSS see what’s new

  • 5 Frugal Kitchen Updates You Can’t Afford To Pass Up
  • DIY Snowflake Holiday Decor Ideas That Are Awesome
  • Awesome DIY Giant Outdoor Christmas Lights
  • Cheap And Easy Outdoor Giant Christmas Ornaments (That Are Freakin’ Cute)
  • Clogged Toilet Bowl Tips That Aren’t Crap

Guest Bloggers

  • Write for Me
  • #13274 (no title)
**Posts may contain affiliate links and I will be compensated if you make a purchase after clicking on my links

Latest Pins!

Privacy Policy | Copyright © 2019 How to Build It