
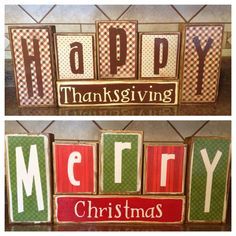
I know I’m not the only one who loves holiday home decor that’s easily interchangeable! It’s great when you can use one piece of decor through October and December! A few years ago, I made these incredible reversible holiday wood signs that spelled out an autumn greeting on one side and a cute Christmas saying on the other. Since I made it, everyone who comes over to my home when I have it up wants to know where I got it! It’s shocking when they learn that the sign was actually homemade! Follow my tutorial to make reversible holiday signs like the one pictured!
Reversible Holiday Signs DIY
from Pinterest.
Here’s what you’ll need to complete the project:
-2 2x4s (cut to 7 inches!)
-2 2x4s (cut to 6 inches)
-2 2x4s (cut to 5 inches)
-1 2×3 (cut to 7 inches)
-Wooden stain or acrylic paint–the choice is up to you.
-Mod Podge
-Scrapbook paper (Fall and Christmas!)
-Vinyl lettering made from your Cricut
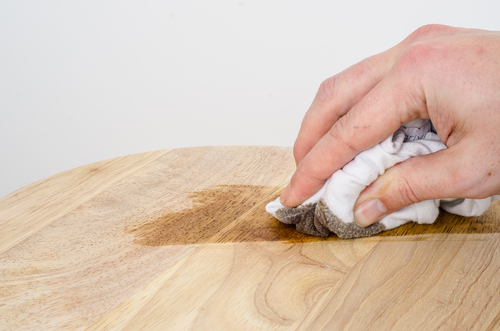
Step One: After you have made the cuts to your materials, you’ll want to give them a good sanding before moving on to the next step! If you forget to sand, just remember that any imperfections in the wood will look much more obvious.
Step Two: After sanding, coat your wooden blocks in a layer of paint or stain. DIYers should note that regular acrylic paint dries much faster than stain does, so be sure to plan accordingly. Make sure that you let your paint (or stain!) dry completely before moving on to the next portion of the project.

Step Three: After you choose a printed scrapbook paper and cut it to fit your blocks of wood, it’s time to attach them. Apply a layer (a very thin layer, a thick layer can cause the paper to lay funny!) of Mod Podge to the backside of your scrapbook paper and place on top of your wooden blocks. Once placed, use the edge of a credit card to smooth out any wrinkles or bubbles in the scrapbook paper. Don’t apply a layer of Mod Podge to the top of the paper, it will affect the look of your finished project!
Step Four: Now, you’ll want to make triple sure that the edges of your scrapbook paper are completely secure. Use a paintbrush to apply layers of Mod Podge to the corners of your craft paper and smooth down for the best finish. Repeat this process as necessary!

Step Five: Use your Cricut to create vinyl lettering that fit your wooden blocks. You can customize the font and the message to best fit your tastes. After you’ve printed your vinyl, apply it directly to the scrapbook paper on your wooden blocks. It’s totally okay if the lettering is slightly off-center, I think that they look especially charming when the lettering is slightly crooked!
Step Six: Repeat the process on the other side of the blocks with fall scrapbook paper and a Thanksgiving message.
Step Six: Now, all that’s left to do is enjoy your new reversible holiday wood signs. I like to display them on my fireplace mantel or on one of the accent tables located within my home. As soon as Thanksgiving is over, I just flip the blocks over and I have cute decor ready for Christmas!
Once you’ve made your reversible holiday signs, tell your friends they can make their own too!