
If you want to give your kitchen a fast, easy and relatively inexpensive update, install new cabinet hardware. It’s a great way to give your cabinets an easy makeover, plus it’s the perfect DIY project for a Saturday. Today I’ll show you how to install new cabinet hardware.


If you are installing new hardware on new cabinets, then you will need to mark {carefully!} where you want the hardware to go before you start drilling. {“Measure twice, drill once” is worth repeating!}. Drilling mistakes are costly because the only way to repair them is with wood putty. To mark your cabinets you will need to find the centers of the drawers and mark the doors. Whether or not you are using single-hole or double-hole drawer pulls, you still need to locate a single center spot for each drawer. Use a pencil or chalk to mark the holes. For upper doors, mark a lower corner, and for lower doors, mark an upper corner.
Once your holes are marked, drill the holes for the screws that will hold your new hardware in place. Tip: stick a piece of masking tape over your hole markings to help the drill grip and not slide on the cabinet face when you start drilling. This is especially helpful for beginners!
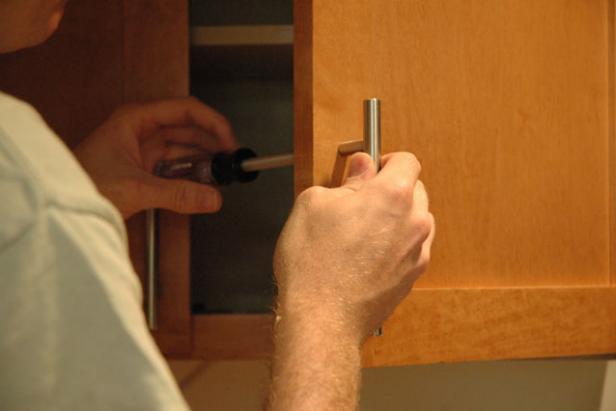
Once the holes are drilled, you can install the hardware quickly and easily using a screwdriver. For double-hole hardware, partially screw in both screws before you give the final tightening to first one, then the other.


