

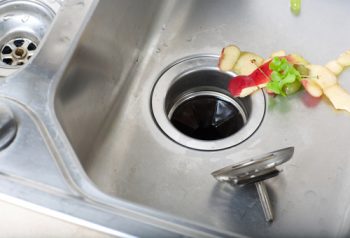
Garbage disposals are one of those things where you never realize how useful they are until yours breaks and you’re left without one. Unfortunately, that very same thing happened to me just last weekend! I know you’re supposed to keep fibrous veggies out of your disposal, but I was peeling carrots and I didn’t clean up my mess too well. My old one practically choked on all of the carrot peelings! Before I knew it, I went from having a functional garbage disposal to not having one at all! We needed to get it replaced ASAP! Fortunately, my husband is a whiz at replacing them, and we got ours replaced in no time at all! Keep reading to see how we replaced our garbage disposal!

Here’s what you’ll need:
-Slip Joint Pliers
-flat/Phillips head screwdrivers
-hammer
-socket set
-Plumber’s Putty
-Replacement disposal (one that is the same model as your last one so you don’t have to replace your existing hardware. This is a MAJOR time-saver.
-Mounting screws
-wire nuts
Step One: STOP! FIRST TURN OFF THE POWER TO YOUR DISPOSAL by disconnecting the dishwasher drain tube from the base of it. Use pliers to loosen the metal spring plant, this is what’s holding the drain arm in place. Now you can remove the drain arm from the base of the disposal.
Step Two: Now that that’s out of the way, you can do what you came here for, removing your disposal! To remove, simply twist it off of the mounting device. Remove the nuts and screws from the underside of the disposal, and remove any electrical cords. Next, remove the mounting assembly and drain by unscrewing the mounting ring and pushing the drain flange up the drain hole. Clean the area.
Step Three: Start by placing a rubber seal of the drain flange. When complete, put the drain flange back into place down the drain hole. Place another rubber seal on the underside of the drain flange (the one under the sink!) and attach a metal back up ring on the flat side up. 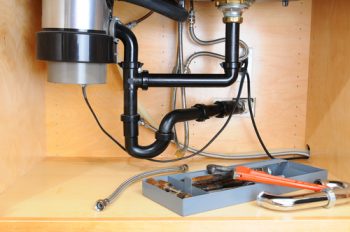
Step Four: Attach the mounting ring loosely at first (don’t worry, you’ll tighten it up later!) Once loosened, push the mounting ring up over the snap ring. Tighten the screws completely before moving on.
Step Five: Time to attach the new disposal! Before beginning, turn your new disposal upside down to remove any potential debris stuck inside of the disposal. Remove the electrical plate and get the electrical wires prepped for connection. Connect the wires, black to black and white to white, and make sure that you tighten wire nuts around each connection. Connect the ground wire to the green screw and replace the cover plate.

Step Six: You’re one step closer to finishing the end of your project! Next, twist the disposal into place on the mounting nut, angling and moving your new disposal until its hanging completely straight. Finish things up by attaching the drain arm and the dishwasher drain pipe.
Step Seven: Almost done! Make sure that everything is in place by running water down the drain for a few minutes. If you have no leaks, you’re good to go! Now just turn the power on!