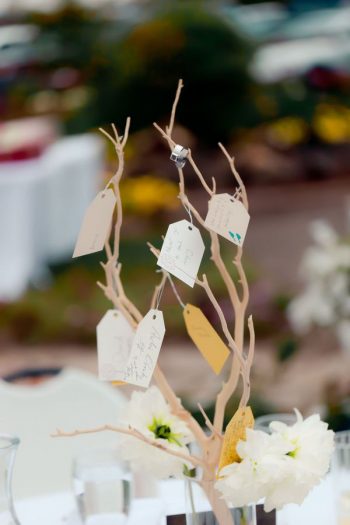

In my house, we like to keep the Christmas festivities burning all year long. While that doesn’t necessarily mean that we keep our Christmas tree up all year long (although, my kid have begged me to do so before!) we do keep our giving tree up all year long. Every year, my family gets together and we divide up twelve ornaments to make amongst ourselves. We are a family of four, so everyone gets to make three ornaments (they’re not really ornaments…just notes that are hung!). Once a month, every year for twelve months, we will pick an ornament as a family. Each ornament is tied to a gift or service the creator of the ornament will provide to another member of the family. It provides for a wonderful family activity and I love when my kids do nice things for one another! Here’s how to build your very own giving tree. You’ll be glad you did!


Here’s What You’ll Need:
-A bundle of 6-8-inch twigs from your garden
-A tall(er) glass vase (I used a copper one for my tree!)
–Parchment or printed stationery
-Markers (to write on the ornaments)
Step One: Time to make your “tree!” To set it up, head out to your garden and trim a bundle of twigs from your tree. You should aim to gather between 8-10 twigs, and they should all be in varying sizes. Keep in mind that they will be held inside of a glass vase, so make sure their height works with one another!


Step Three: Arrange your garden-gathered twigs inside of your glass vase so they are displayed nicely. You won’t need to add any water to the vase, but you can fill it with a vase filler like pinecones, river rocks, or fake garden moss. It’s totally up to you! You can even add a ribbon around the base of your vase to make it more festive if you desire.


Image from Simply Vintagegirl
Step Four: After your “tree” is assembled in the vase, gather your family to create the twelve “ornaments” for the months of the year. Use something heavier than printer paper to keep your ornaments in good shape all year long. I like to use parchment or stationary backed with a layer of cardstock for our “ornaments.” When writing your gifts on the ornaments, consider including things like helping with chores, taking a younger sibling to the mall, or doing an activity together. It doesn’t have to be just for one person in the family either, a service or activity could be gifted to everyone if the giver chooses!
Step Five: Tie your ornaments to your giving tree using the ribbon you had previously picked out for the project. Place your tree in an area of the home where it will not be forgotten about and look forward to the monthly event spent with your family.


