
Every December first, wether it’s a school-day, or a weekend, my kiddos get up early to open the first package on our holiday advent calendar. While the look of our advent calendar has changed over the years, we’ve always considered an advent calendar to be a necessity! There’s nothing better than counting down to Christmas with a daily treat or activity. It’s a great way to spread the fun out all month long! A few years ago, I made an advent calendar out of nothing more than a few gallvanized buckets and some wood scraps. It was a super easy project and it’s been a family favorite ever since. I’ve even had my neighbors compliment me on the rustic charm of my DIY advent calendar. Just imagine my joy in telling them that I created it myself! Stop looking for the perfect advent calendar at the store and make your own instead using the tutorial below!

Image and original (this is my adapted version!) from Sugar and Cloth.
Here’s What You’ll Need:
-Five pieces of pine or enough to fit the following dimensions: 34-3/14 inches for the triangle sides, 28” for the triangle base.
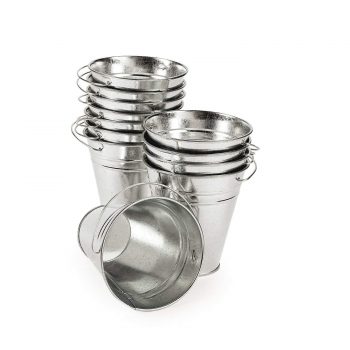
-25 2-inch galvanized steel buckets
–25 roofing nails (1-1/4 inch)
-Wood stain or chalk paint
-Clear and white spray paint
-Number stickers for the buckets (you’ll need TONS of 2’s and 1’s, so be sure that you grab enough!)
Step One: First, you’ll want to create your wooden Christmas tree. To create, secure your pieces of pine together using a hammer and nails. Take note of the dimensions mentioned above and use them to trace and cut a traingle shape out of the wooden tree.
Step Two: Now that your tree has been created, you can stain or paint it in whatever color you would like. I painted mine in a coat of white chalk paint and then sealed things off with a top coat of clear spray paint to prevent chipping. As always wait for the paint to finish before moving on to the next step.
Step Three: Once dried, arrange your galvanized buckets onto your calendar. But before you nail them in, draw a little dot with a pencil so you’ll know where the nail should all be placed. There’s nothing worse than getting to the end and realizing you ran out of room! Once all of your buckets have a spot marked on your tree, hammer the nails to the dots and hang up your buckets!
Step Four: Next, mist the galvanized buckets with a bit of white spray paint to make it look like it’s been dusted in snow!
Step Five: After the spray paint has dried, place your stickers on the galvanized buckets in the order of days. You can also number the packages instead of printing them on your buckets, like below. Now, all there’s left to do is fill the buckets with gifts..and isn’t that the best part?

Step Six: Wrap up small gifts for your family members like: a new Christmas book or DVDs, ornaments to hang on the tree, or things like socks, underwear, and toothbrushes. Of course, not every advent calendar filler has to be a gift, fill some with things like baking cookies, decorating the tree, or caroling! Imagine the wonderful memories that will be created!
For other advent calendar ideas, check out this article from my friend at Picky Stitch!