
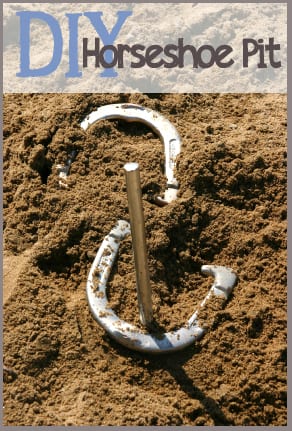
I always love yard games in the summer! They are some of my best memories growing up. Horseshoes is a classic outdoor summer game that is fun for adults and kids. With a level area, some lumber, re-bar, sand, and a few horseshoes, you can learn how to build a horseshoe pit yourself and start playing! (*NOTE: For some of these, you need to be handy with some woodworking tools.)
A horseshoe pit consists of two stakes set at a specific distance apart and a pit area where players stand to throw horseshoes. Here’s a step-by-step guide on how to build a horseshoe pit in your backyard:
Materials and Tools You’ll Need To Build A Horseshoe Pit:
– Two 24-inch horseshoe stakes
– Four horseshoes (regulation size and weight)
– Measuring tape
– Wooden stakes or flags
– String or rope
– Shovel
– Level
– Sand or clay (to fill the pit)
– Tamping tool or hand tamper
– Wooden boards (optional, for pit borders)
Step 1: Choose the Location
Select a suitable location in your backyard for the horseshoe pit. Ensure that the area is flat and free of obstacles. Regulations suggest a minimum distance of 40 feet between the two stakes, but for casual play, you can adjust the distance according to your preferences.
**Step 2: Mark the Pit Area**
Measure and mark the pit area. The pit should be 6 feet by 6 feet square. To create straight lines and right angles, you can use wooden stakes or flags along with string or rope to outline the pit.
**Step 3: Dig the Pit**
Using a shovel, dig a pit within the marked area. The pit should be approximately 4 inches deep. Ensure that the pit is level and that the sides are straight and even.
**Step 4: Set the Stakes**
Place the two horseshoe stakes at opposite ends of the pit, centered along one side. The stakes should be 40 feet apart, measuring from the inside edge of each stake. Make sure they are vertical and firmly set in the ground. You may need to use a level to ensure they are straight.
**Step 5: Fill the Pit**
Fill the pit with sand or clay. The choice of fill material is up to you, but it should be soft enough to allow horseshoes to stick upon landing. Clay is often preferred for competitive play, while sand is more forgiving for casual games. Fill the pit until it’s level with the surrounding ground.
**Step 6: Compact the Fill Material**
Use a tamping tool or a hand tamper to compact the fill material in the pit. This will create a firm and level playing surface. Continue to add fill material and tamp it down until you achieve the desired level.
**Step 7: Create Pit Borders (Optional)**
To prevent the fill material from spreading out, you can install wooden boards around the perimeter of the pit. This is optional but can give your horseshoe pit a more finished look. Attach the boards securely to the ground using stakes or screws.
**Step 8: Mark the Pitching Distance**
Measure and mark the designated pitching distance from the center of each stake. Regulation play requires a distance of 40 feet, but you can adjust this based on the skill level of the players. You can use wooden boards, flags, or paint to mark the pitching line.
**Step 9: Set Up the Game**
Now that your horseshoe pit is complete, you can set up the game. Place the four horseshoes near the pit and divide players into teams. The objective is to throw the horseshoes and encircle the stake or land the horseshoe within a certain distance from the stake to earn points.
**Step 10: Enjoy the Game**
Gather your friends and family, explain the rules of the game, and enjoy hours of horseshoe pitching fun in your newly built pit.
Remember that safety is important during horseshoe play. Players should stand a safe distance away from the pit while someone else is throwing horseshoes, and only one person should throw at a time. Always use caution to avoid injury.
Optional Horseshoe Pit Elements:
- Backboard—this stops the horseshoes if you throw them too far.
- Pitching platform—these are the planks on the side of the sand pit. Technically you are supposed to stand on the pitching platform when you toss the horseshoe to the pit on the opposite side.
- Sand pit—you can use play sand you would use in a sand box. Make it at least 6 feet wide.
- Stake—could be rebar or other sturdy material. This is what you try to hook the horseshoes on! Regulation states the stakes should be 40 feet apart.
- And, of course, the horseshoes themselves! You probably won’t be able to find those at a hardware store, but you can find them at sporting goods stores.
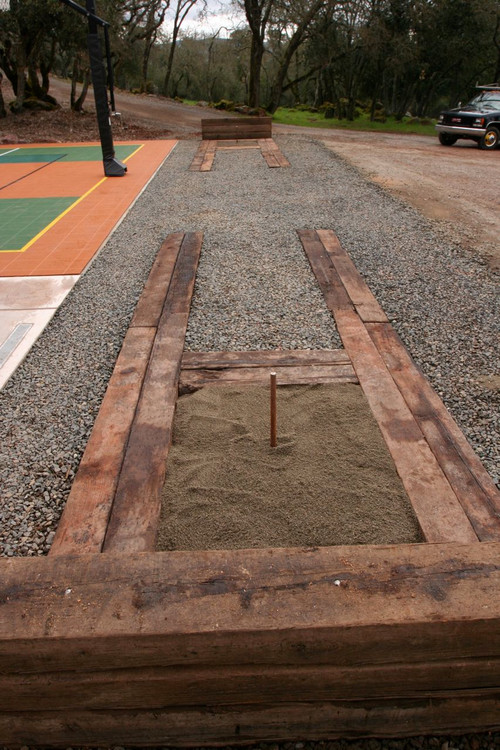
Here are a few examples of some different horseshoe pits: This first one is from Brooke Giannetti.

This one is from Houzz.
Additional Resources on How To Build Your Horseshoe Pit
- Horseshoe pits can be made of different kinds of materials. Here are some links to different tutorials:
- Wood horseshoe pit with pitching platforms (more intense project): http://www.diynetwork.com/how-to/how-to-build-a-horseshoe-pit/index.html
- Horseshoe pit made from stone wall blocks: http://www.lowes.com/cd_Do+It+Yourself+Horseshoe+Pit_1325859769_
- A more simple wood horseshoe pit—no pitching platforms: http://www.wikihow.com/Build-a-Horseshoe-Pit
- An extremely simple tutorial for a wood horseshoe pit—no backboard, just outline the foul lines with wood: http://canadianhomeworkshop.com/1249/outdoor-renovations/weekend-diy-set-up-a-horseshoe-pit
- If you’re looking for a really quick set-up, you can just put a stake in the ground, rough up some dirt and use spray paint to identify the foul lines.
- Need a refresher on the rules of the game? Here’s the official handbook! http://www.horseshoepitching.com/notices/RGSBook.pdf