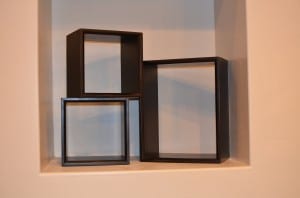
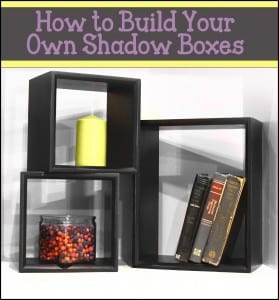
This was a fun project for me because it was not too difficult and we have had a lot of fun decorating with them in different ways. Not only can they hang on the walls as shadow boxes, but they are nice to stack on top of a piece of furniture and decorate as well.
Wood Selections: These do not necessarily need to be hardwood, I had some left over cherry for mine and decided to use that, cherry is nice because it is a closed grain wood and sands very smooth. But if I were to buy a wood to build these with it would be either soft maple, or poplar.
Plane to Desired Thickness: With shadow boxes my personal opinion is the thicker the better, so I would plane your wood down to the largest thickness available to remove all the blemishes and use that.
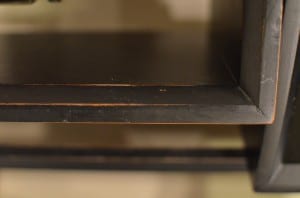
Router the edges: I simply used a 45 degree chamfer bit and passed it across one edge, I think with shadow boxes you want to keep the design simple and clean since the items in the box are the display, not the box itself.
Cut to length: I did two smaller square boxes and one taller box, this gives us a lot of options in how to hang them on the wall. Cut all your pieces to length with a 45 degree angle.
Biscuit Joint all corners: I used a biscuit joint to strengthen the corners, it is difficult to get end grain to end grain joints to glue together very well so I recommend some sort of reinforcement. If you do not have a biscuit jointer you can use a ¼” dado blade down each side of the joint and put a ½” x ¼” slat between the two and it will hold them together very well also.
Glue and Clamp: Next put a generous amount of glue on each corner, then put them together with a ratcheting band clamp. This can be done with regular bar clamps but it is very difficult to get it square and even pressure on all corners. Plus Harbor Freight has cheap ones for $6 so there is no real good excuse for not using them.
Sand: Once the glue has dried remove the clamps and sand the outside smooth, putty any gaps or imperfections, and finish sand all sides.
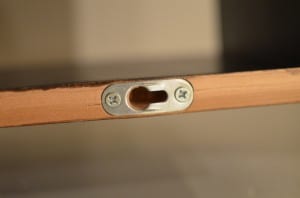
Install Hanging hardware: There are different methods for hanging shadow boxes, I wanted mine to sit flat against the wall so I routered out a small section and used flush mounting hardware. But an easier way is to use standard picture hanging mounts as well.
Finish: Then you are ready to finish these with whatever method you have decided.