
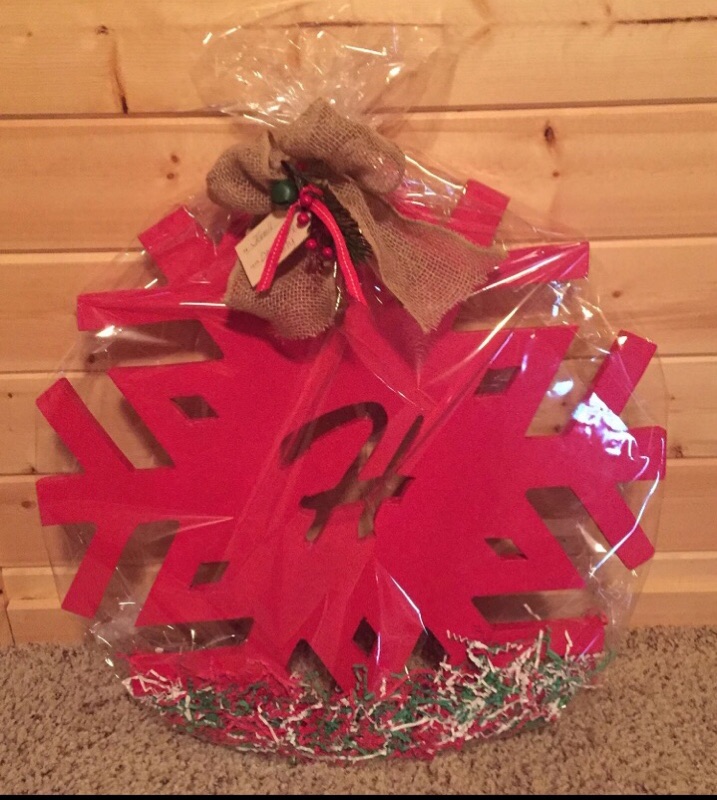
Today we are talking about a great idea for Christmas. Try these easy to make DIY snowflake gifts.
It can be hard to come up with a neighborhood Christmas gift that your neighbors will love but one that doesn’t cost you a fortune! Just a few years ago I found myself in this very situation. I had 24 neighbors that deserved a Christmas gift, but I had no ideas when it came to the actual gift. Just when I thought that my neighbors would be gifted the regular ole’ basket of cookies I stumbled upon an incredible tutorial for a wooden snowflake to be used in home decor. The tutorial was so easy to complete that I knew immediately that my neighbors would each be receiving one of these that year. If you, like me, are worried about what to give your neighbors this Christmas, try your hand at making one of these gorgeous DIY snowflakes. Your recipients will love these!
DIY Snowflake Gifts
Here’s what you’ll need to make your own DIY snowflake gifts:
-1 24” by 24” inch piece of plywood
-This snowflake stencil
-Paint (if desired!)
Step One: One each corner of your wood piece, measure (up the edge) 5 1/8 inch and 12 inches. Make sure you do this on all four corners of your piece of wood. After you’ve marked each of the four corners, now mark the center point of the wood.

Step Two: Use a straight-edged ruler to draw outlines in between opposite diagonals. You’ll want to slice through each center point like you are cutting out the pieces of a pie!
Step Three: Once you’ve determined the center point, measure out 3 inches and mark the line.
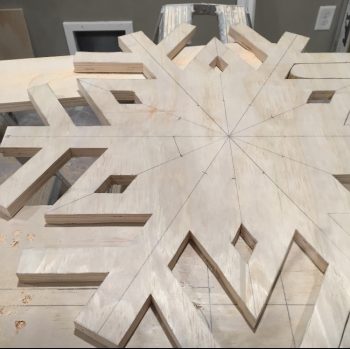
Step Four: Use this pattern when completing the next few steps. After you’ve printed the pattern out, start 3 inches from the center of the wood and trace the template out. Complete the tracing process on both the top and bottom of the template.
Step Five: Repeat the tracing process until you have a complete snowflake laid out on your piece of wood.
Step Six: After tracing the snowflake onto the pieces of wood, use a jigsaw to carve out the details of the snowflake. To cut the smaller areas, use a drill to create a hole for the jigsaw blade. It’s much easier this way. Be sure that you are working carefully because any mistake will show up on the finished version of your project!
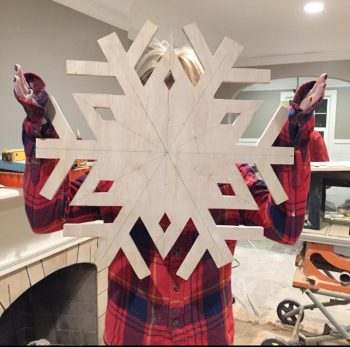
Step Seven: Once you have cut out the outline of your snowflake, make sure that you take time to sand the edges and get rid of any roughness. I used my electric sander to complete this process!
Step Eight: Once cut out, now is the time to add a coat of paint! Just make sure that you allow the project to completely dry before wrapping it up and gifting it to your neighbor!
