

Do you hate your current kitchen table? Living with that kind of energy can’t be good for you, so it’s time to do something about it! Revamp or really just replace your existing dinner table with this incredibly easy DIY farmhouse table.
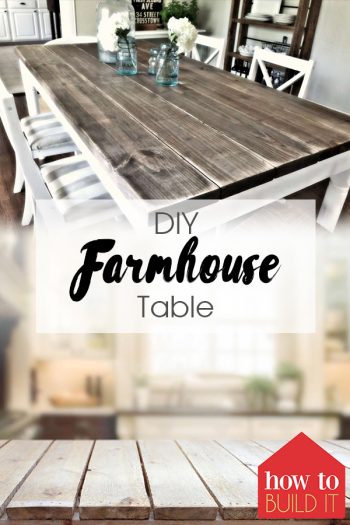
DIY Farmhouse Table
DIY Farmhouse Table Materials List
You’ll only need a few items from your garage to get this project started and you’re sure to absolutely love the results. Stop hating your current kitchen table; you’re just one single DIY Farmhouse Table project from one that you’ll love. Let’s get started!
Here’s what you’ll need:
| 3 | 2×12” Tabletop pieces |
| 2 | 2×6” Beadboard end pieces |
| 4 | 4×4” Table Legs |
| 2 | 4×4” Short stretcher pieces |
| 1 | 2×4” Long stretcher pieces |
| 2 | 2×4” Short apron pieces |
| 2 | 2×4” Long apron pieces |
| 3 | 3-inch screws |
| 2 | 1/2″ Pocket Hole Screws |
| Wood Glue |
Tools Needed for Your DIY Farmhouse
| Safety Glasses |
| Drill & Drill bit set |
| Circular Saw |
| Tape Measure |
| Pencil |
| Level |
| Carpenter Square |
| Sheet Sander |
Step By Step DIY Farmhouse Construction
Step One: Cut Your Lumber
To begin, you’ll have to start by making a few cuts to the lumber (after you have measurements, of course). Decide how long and tall you want your table and use those measurements when making any cuts. Add crosscuts to the beadboard, table legs, and even the tabletop. You can even cut the short aprons to meet your measurements (the short aprons will keep the legs attached to one another on the short side), but you should wait to cut the long ones.
Step Two: Set Up Table Legs
What’s a table without a sturdy base? Time to make one! Attach a leg on either side of the short aprons, using three-inch screws. Now you’ll want to clamp your table legs to the apron using a 1/8th-inch spacer. Repeat this very process on the other side. Once complete, you’ll have a sturdy foundation, and your tabletop won’t be going anywhere!
Step Three: Glue The Stretchers
Now, you’re going to cut a cross-lap joint in the middle of the small apron. Once completed, this slot is where your long stretcher will be placed! Glue the long stretchers into the short ones. Make sure that you wait for everything to dry before moving on. It could affect the end result of your DIY farmhouse table.
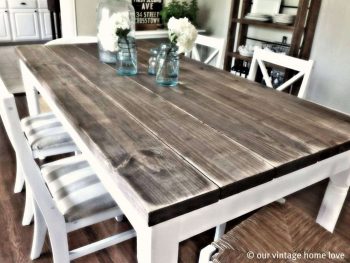
Farmhouse Tabletop
Step Four: Assemble With Screws
Once dry, move your table legs even with the stretchers, and assemble everything with screws. I used pocket screws for my DIY farmhouse table, but you can use whatever kind of screws that work best for you!
Step Five: Fit Tabletop Pieces Together
Now that your legs and framing pieces have been attached together, you should begin building the pieces of your tabletop. Fit your tabletop pieces together tightly, securing everything together with wood glue. Secure the pieces together with a few more pocket screws, ensuring that your project stays together for as long as you’d like! You’ll want to use a rag or a tack-free cloth to remove any excess glue from your tabletop. You won’t like the way it looks once dry.
Step Six: Attach Tabletop
Here comes the fun part: time to attach your tabletop! Use right-angle brackets to attach your freshly-dried tabletop to the table legs. After I finish each of my DIY furniture projects, I like to go to town with an electric sander. Sanding your furniture before you paint really does affect the finish and you’ll be so glad that you did it.
Step Seven: Stain Your Tabletop
Finish sanding? Stain your new farmhouse table if you would like, or use my chalk paint guide to give it a farmhouse finish!
Frequently Asked Questions
How do you make a simple farmhouse table?
Try this YouTube video on how to make a simple DIY Farmhouse Table
What kind of wood should I use to build a farmhouse table?
Pine or Maple seems to work for most projects.
What type of wood is best for a tabletop?
Our recommendation for the best wood for a farmhouse table is Maple since it is very resistant to scratches and dents. Another option is pine.